
How to Get the Most out of The Acros Setting on Your Fujifilm X Series Camera (Premium)
Fujifilm Acros is one of the most interesting film simulations available for your Fujifilm X series camera. For a while, the cameras offered a monochrome setting but it’s absolutely nothing like what Acros can deliver. Since it’s become available, a strong argument can be made for the fact that it’s amongst the most popular offerings available. The reason for this has to do with the fact that Acros is overall very versatile and is very dependant on the contrast in the scene and the contrast of the lens that you’re working with. Want deeper blacks? Simply underexpose and the whites will still be there.Here’s how you can get even more out of Acros.
Working in Lightroom: Use the Camera Calibration

Red filter
Arguably, most photographers who use Fujifilm cameras are working in Adobe Lightroom. A whole lot don’t know about using the Acros camera profile. To access this, simply go to the develop panel and find your RAW photo. Providing that you’re using a camera that has Acros built in, you can scroll down to the bottom and change the Camera Profile from Adobe Standard to Acros and its sub-settings. In some instances, you may want to also set your image’s white balance to daylight, but that isn’t so essential.
Fujifilm overall has done a pretty good job of trying to render their own film–arguably it’s better than the color film simulations.
What to Shoot: Portraits, Events, Street, Photojournalism
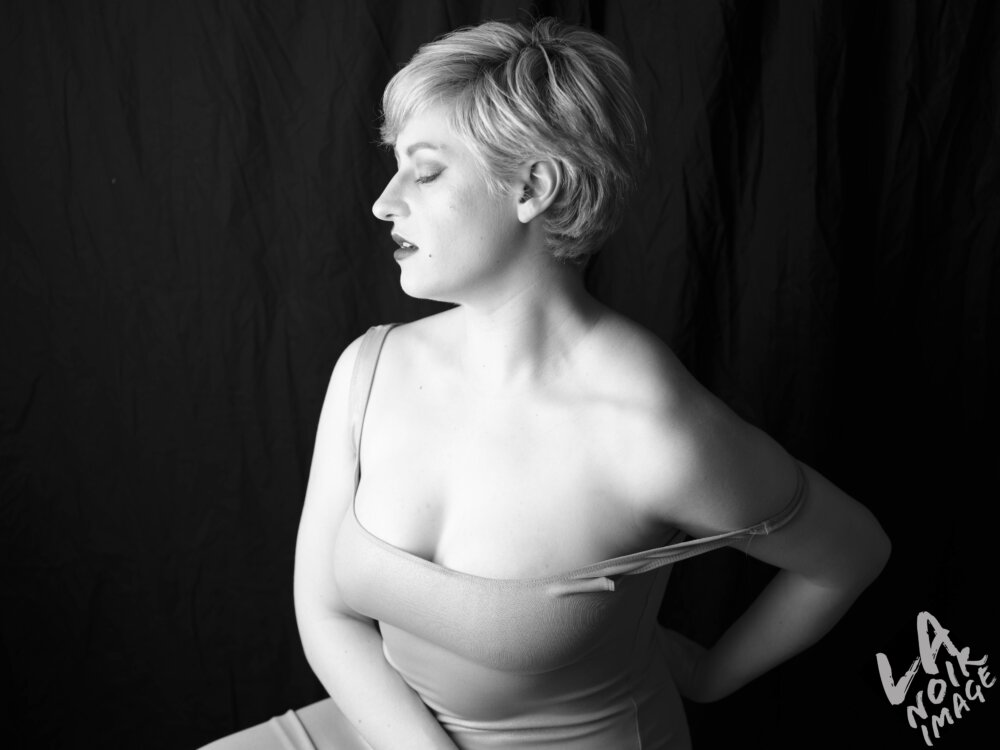
Fujifilm Acros was available in a variety of different ISO options. For that reason, it was also very versatile but mostly used for portraits, street photography, events, and in some instances landscapes. Fujifilm Acros is a very versatile film in that right out of the box, it isn’t so high contrast. Instead it adapts to the light in the area that you’re shooting and your exposure a bit more than some other films such as Japan Camera Hunter Street Pan 400. That’s because Acros is a negative film emulsion.
With the convenience of digital photography though, it means that you can essentially just go ahead and shoot anything and everything in an Acros setting simply because you like the way that it looks. Many Fujifilm X photographers have been using the setting for street photography and lots of portrait shooters have been using it for portraiture. On top of that, there are loads of photojournalism style shooters using the film simulation.
These genres seem to be more popular than landscapes.
Look at the Filter Sub Settings

Red Filter
Acros has various filter sub-settings on your X series camera that are designed to emulate one look vs the other. To explain this, film photographers often use color filters on their lenses to get a different look. Fujifilm will explain this with each setting; and most of the time the red filter seems to be the most popular. It also strongly depends on both your tastes and the types of content/subject matter that you’re shooting.

Yellow Filter
Again, due to the convenience of digital photography, you can easily switch from one to the other using Lightroom’s built in Camera Profiles for something like the Fujifilm X Pro 2. Just because Fujifilm says that, for example, Yellow may be best for landscapes or something, doesn’t mean that that’s the look that you want.
However, what I can surely tell you is to closely look at the dominant colors in your scene.
With all this said though, know that you’ve still got a lot of options digitally in post-production if you’re editing your RAW files. Adobe Lightroom’s Develop panel has color channel controls for hues, luminance, etc. When using the Acros setting, you’ll more or less just be controlling how bright each channel is. So when editing, you’ve got that to help you out. This can aid in getting more details from a blown out highlight if that’s what you really want.
High ISO Output

While cameras like the Fujifilm X Pro 2 and Fujifilm X-T2 already output images that look pretty darn good at higher ISO settings, Acros embraces this look even more. Any sort of noise that the X Trans sensor emits will look very film-like when looked at on another digital device such as a desktop screen. Because of this, you should simply just embrace that noise as it’s going to look very film-like.
To that end, don’t even bother with noise reduction in-camera for your RAW files. Just embrace the noise because it’s going to look good. There are surely schools of thought that will feel like that’s a lazy thing to do; but if it creates a better image, who cares?
And with that said…
Forget the Grain Effect (at low ISO, it has such incredibly fine grain)

Personally speaking, I’ve never exactly been sure why Fujifilm put a grain effect into their cameras. With Acros, you should know that at lower ISOs, the film has incredibly fine grain. So just turn that setting off altogether and work with what the camera gives you.

Here’s an example: lots of readers thought that this photo was shot digitally; but it’s actually 6×9 Acros 100. Super fine grain and detailed, right?
Be conscious of the Lighting You’re Working With (maybe underexpose a bit)

Lastly, as we’ve stated a number of times be careful and conscious of the light. More than perhaps any other film simulation with the exception of Classic Chrome you’ll see that lighting is the most important thing with Acros simulations. If you’re one of those photographers who genuinely really likes making their own light in a studio setting, you’re really going to like what Acros can do due to its versatility.
There’s nothing stopping you from also just getting that photo in-camera and outputting a great JPEG photo. However, that’s a mentality more for the photographer that doesn’t like editing and instead enjoys simply shooting a whole lot more.