Shooting Dark & Moody Black and White Portraiture (Premium)
Dark and moody portraits are a growing trend in today’s market that has until recently been dominated by bright, colorful, vibrant imagery. Shooting dark and moody portraits, or low-key as some may refer to it, relies not on overwhelming colors to grab the viewer’s attention, but rather relies on the light to draw them in. This is what makes dark and moody portraiture so perfect for black and white photography, the power light, contrast, tones all affect a black and white image differently than a color one – and in the case of dark and moody portraiture, how they affect it works to your advantage as a photographer.
If you are reading this then the chances are that you are interested in learning how to shoot dark and moody black and white portraits, or you already dabble in them and you are looking for some tips to help improve your results. This piece should be of value to you no matter which side of that spectrum that you fall on. The first bit of advice that we have for you if you want to shoot dark and moody portraiture is to throw everything in your mind about what a ‘proper exposure’ is out and come at this with an open mind. Shooting dark and moody is different than shooting a ‘properly exposed’ portrait and in order to get the best results you need to be mindful of that.

To begin, in order to shoot a dark and moody portrait you need to be in a dark and moody environment – this assumes you are shooting with natural light. If you are primarily using strobes there are some things you can do in a studio to do that, but that will be beyond the scope of this article. Since we are talking about shooting natural light portraiture, we are going to assume that you are indoors and that your main source of light will be a window or windows. If this is the case, you are going to want to use your blinds or curtains and cover as much of the window as possible. You want just a sliver of light coming into the room.
On another note real quick, it also helps to shoot in a room with darker walls, rather than white walls. You can get the dark and moody look with white walls, but it’s much trickier thanks to you essentially being in a giant softbox with the white walls bouncing a lot of light around. One thing you will want, though, if possible, is a reflector to bounce a little bit of light back into the shadow regions of your subject.

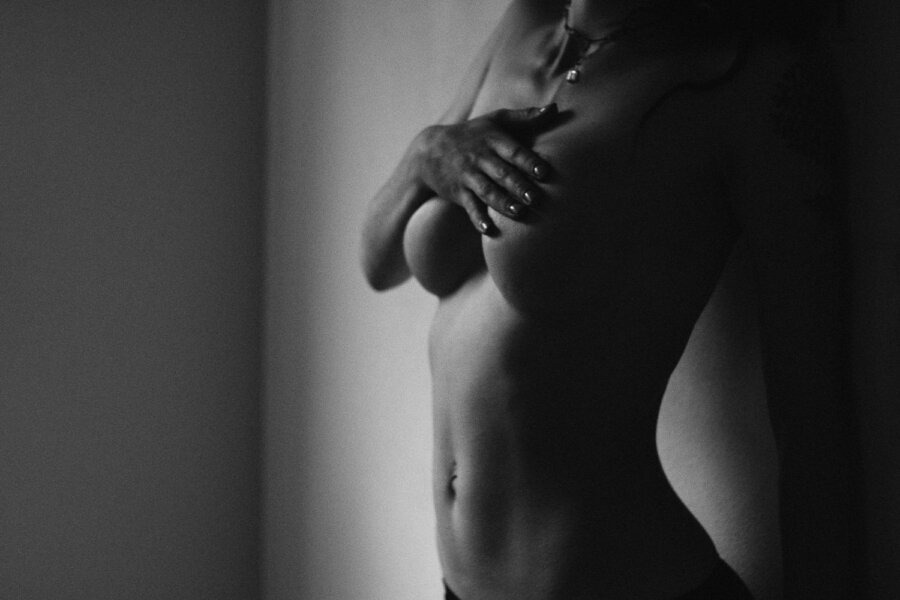
As far as positioning your subject and posing, we have found that we really like the look of back and side light portraits in the dark and moody style. So that is what we recommend. That is not to say that you can’t get great results with the window to your back shooting with the light, but when you back or side light the subject in a dark room with very little light from one source it creates a drama and a feeling that we think sets it apart from other forms of natural light portraiture.
Posing works mostly like it would with any other genre of portraiture, but with one thing to consider. if you are shooting a face, it can be offputting to have large portions of the face in shadow vs light, so it is better to go with one or the other. Either turn your subjects face away from the light and use the highlight as a nice rim light to chisel out the jawline, or turn your subject’s face mostly into the light (go for that sort of Rembrandt look if possible).
So now that we have those elements out of the way, the piece that you are probably most interested in is in relation to what settings are ideal for this sort of portraiture look. The truth is, if you have been a photographer long you will know this, the settings vary greatly from room to room, day to day, etc. However, in general, we like to shoot between 1/60th and 1/125th, as this optimizes the natural light you can use without diminishing your ability to hand hold your camera. Our aperture is almost always wide open, as well as the ISO being lowest possible to maintain the desired overall exposure.
So what is that overall desired exposure? Well, there are a few ways to look at it. You can either meter for a highlight on your subject and if that is the case then you will want to underexpose by 1 to 1.5 stops, this allows you to capture all the highlight detail. You can also meter for the shadows, which most of the time is easier as a lot of your subject and scene will be in shadow. If you meter for the shadows then you will want to underexpose by 2-3 stops.

The goal is for your shadows to be dark, but still, retain just a hint of detail so that you can see into them, but not without looking closer. This helps to create some mystery and bring some imagination on the part of your viewer into the picture.
If you are shooting with a mirrorless camera you will have the benefit of being able to see what you are getting through your EVF, a huge advantage when doing this sort of portraiture because it lets you really dial in those settings to get the image as close as possible to what you want your final result to look like.
As any good photographer knows, in regards to creating a great image, pressing the shutter is only part of the battle. A big key to getting you dark and moody images to turn out ‘right’ is how you post-process those images. To that end, we will continue this discussion on the second part of this piece, where we will talk in more detail about how to process your images once you have them back at home on your computer.