
Film Photography for Street Photographers: The Basics (Premium)
Fifth Avenue, New York, 1978. © Mason Resnick
Street photography has, over the past few years, seen a revival thanks to the rise of relatively affordable “street-savvy” digital cameras, and the fact that the cost of taking a picture is a lot less when you do it digitally. Since street photography is a high-risk, high-reward approach, which means you have to take a lot of bad pictures to get to good ones. So, since the cost of film is so high, street photography has, for the most part, gone digital.
And yet.
Some of the greatest street photos ever shot have been on film. Garry Winogrand, Joel Meyerowitz, Henri Cartier-Bresson, Elliott Erwitt..the list of iconic film street shooters goes on. Even today, many street photographers continue to shoot film. Jeff Mermlestein shoots color film; Bruce Gilden goes back and forth between color and black and white film.
Chinatown, New York, 1980. © Mason Resnick
The skyrocketing cost of film can make shooting film more expensive than digital in the long run, but there are ways to mitigate the costs. One is to bulk-load. A 100-foot roll of Ilford HP5 Plus, for example, can cost under $60. You can pick up a bulk loader and reusable film canisters on eBay. You can typically get around 30 36-exposure rolls out of a 100-foot roll, reducing your cost to about $2 a roll, which is pretty good compared to the $3.50-5 per roll you’d have to pay for a pre-loaded roll of 36 exposure ISO 400 film. You can even experiment with low-budget films such as Kentmere 400, which costs $39.95 for a 100-foot roll.

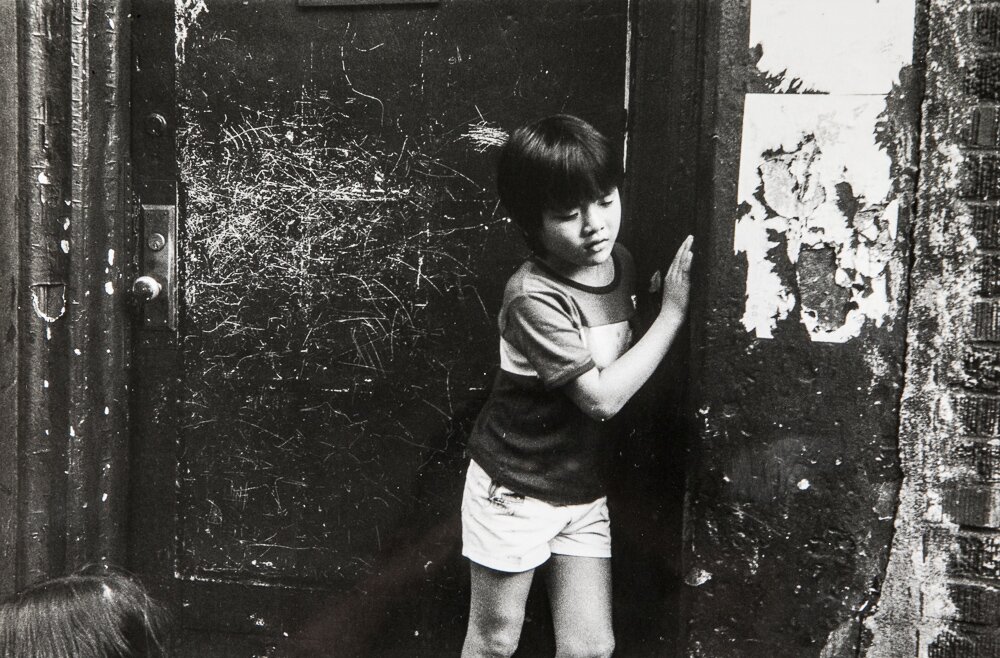
New York, 1978 © Mason Resnick
You can also save a lot by riding the retro DIY wave and processing everything yourself. This may require some adjustments to your living space that are beyond the scope of this article.
Why go to the trouble when digital is relatively cheap, you can check the results immediately, and doesn’t require designating a room in your domicile for stinky chemicals?
I put it to you that the key reason for doing street photography on film is that there is none of the instant gratification that comes from shooting digitally. There’s no LCD monitor; you can’t check the photo you just shot (come on, we’ve all done it). Without that distraction, you can be more present—more in the moment. It frees you up to be perceptive to new possibilities.

Outside Democratic Convention, New York, 1980. © Mason Resnick
Since you need to wait to process your film, time can go by, separating you from the experience of taking the picture, which can bias your opinion of your photos. You’re more likely to look favorably on images you shot on a warm, sunny day while in a great mood than photos you shot on a gloomy day when you were mad about something…even though the images themselves, seen by somebody who didn’t have your picture-taking experience, may have the opposite reaction. So, letting time go by and approaching the images “cold” helps you do a better job editing your work.

New York, 1980 © Mason Resnick
Winogrand’s process
This isn’t just my opinion. Some of the greats, such as Garry Winogrand, left thousands of rolls unprocessed for a year or two in his prime, (When he died in 1984, he left around 2,500 unprocessed rolls and over 6,000 contact sheets that had never been printed.) I was lucky enough to see Winogrand’s process film shooting process, which has pieces we could all learn from. I’ve written about of a workshop I took with Garry Winogrand in the past, but never went into detail about how he shot and processed film.
Until now.
Fortunately, Garry went into great detail about his shooting and film developing workflow during the Master Workshop I took with him in 1976. While the casual observer may consider Garry Winogrand’s shooting technique to be haphazard, it was actually anything but that. From looking for vertical (rather than horizontal) points of reference to working at intimate distances from the people populating his photographs, Winogrand didn’t follow the traditional rules of composition, or developing.

Flushing, New York, 1981 © Mason Resnick
Garry exposed everything manually. He used bulk-loaded rolls of Kodak Tri-X exclusively (it was in the days before T-Max, and Ilford HP-5 was not widely available then), and knew the film so well he could accurately set exposure without a meter just by looking around. He was intimately familiar with his gear and could change exposure settings without looking, allowing him to focus on the scene around him. Since he used a Leica M camera and a 28mm lens, he also knew when he was in focus before looking in the finder by simply moving the focus ring tab. He was precise and fast.
His camera bag had dozens of strips of white photo masking tape affixed to the top. Every time he completed a roll of film, he would jot down notes on one of the strips, attach it to that roll, and drop it in the bag. This information would include lighting conditions (cloudy, sunny, hazy sun), scene contrast, location and perhaps a note to pull or push process. It was in his own time-saving shorthand code and provided valuable exposure and shooting environment information to help him process the film appropriately.

57th Street, New York, 1979. © Mason Resnick
Back in the darkroom, Winogrand would develop film anywhere from 6 months to two years after taking the pictures. He’d choose his developer based on shooting situations. High-contrast sunlit scenes were processed in a lower-contrast solution; push-processed film was done in finer-grain developer. He processed by inspection: Halfway through developing the film, he’d unroll it each roll a few frames and look at it, illuminated by a green safelight (which is the only light source that is safe for film), and adjust development time according to what he saw. When shooting in lower light, he would push-process up to ISO 1600, using a finer-grain developer.
Moving on to printing, Winogrand would make work prints by batch-processing, to save time. He would print entire rolls in one batch, exposing the negatives that he wanted to see larger, and then store them in a safebox. After exposing 25-50 frames, he’d process them all at once, constantly shuffling the images while they sat in the developer tray so they would be fully processed.
He’d then go through each print and divide them into “yes” and “no” piles, and then fine-print the “yes” images.
Other street photographers work differently. Cartier-Bresson, for instance, had no interest in processing his photos, and simply handed his negatives to a master darkroom technician, who processed and printed the photos for him, so he could continue taking pictures.

Broadway, New York, 1979. © Mason Resnick
Film for Street Photography
Since typical street shooters need to capture fast-changing moments, the faster the film the better. Kodak Tri-X and Ilford HP-5 Plus, are excellent choices because they can handle being push-processed from their native speed of ISO 400 up to ISO 1600. Both have a wide dynamic range and are more forgiving of exposure errors or impossible lighting that often comes up on the street. Ilford XP-2 is another choice. It’s a chromogenic B&W film, which means you can take it to any print lab and have it processed in the same way as color film. The negatives are remarkably fine-grained, and you can also print them in your home darkroom.

Lower East Side, New York, 1982. © Mason Resnick
8 great film cameras for street photography:
Here’s my short list (and brief explanations) of classic film cameras that are small, quiet, precise, and ideal for street photography. I have, at one time or another, used every one of these on the street. Price range based on a recent look on eBay.
Leica M2 or M3 ($750-10,000, body only)
This is the camera used to take some of the most famous street photos you’ve seen, and is still the only way to go for some street photography purists. I used mine for almost 40 years, until its shutter finally gave way.
Rollei 35 ($75-400)
Tiny, two-handed camera (shoot rightie, wind leftie) has a collapsible 40mm lens, and you have to guestimate focus. You get used to it. Optically superior, gave me big-camera images. The German-made models are better.

New York, 1983. © Mason Resnick
Olympus XA 4 ($185-300)
The XA’s clamshell design was groundbreaking, and its pocketable size and quick focus and is virtually an invisibility cloak. The XA4 is the only XA with a 28mm lens.
Leica CL ($350-$800 body only)
Jointly produced by Leica and Minolta, the CL is an honest-to-goodness rangefinder and takes most M-mount lenses (including the specially-made Minolta M Rokkor 40mm). Leica joy at a fraction of the Leica price!
Minolta TC-1 ($720-1,600)
One of the last brilliant posh compact cameras of the film era, the TC-1 features a 28mm f/3.5 autofocus lens and manually-set aperture and shutter speeds and spot metering. This felt good in the hands.
Canon Canonet GIII QL17 ($85-200)
The “Poor Man’s Leica” has a built-in 40mm lens with a focus tab, honest-to-gosh rangefinder focusing, manual everything, and a nice, low price. Don’t point it towards the sun, though; the uncoated lens flares like crazy.
Yashica T3 ($150-350)
It might have been an auto-everything camera, but the T3 had a unique waist-level viewfinder, which lets you actually compose hip shots without guesswork. I got some really interesting pictures with this one.
Editor’s note: All photos accompanying this article were taken by the author with either a Rollei 35 or Leica M3 with a 35mm lens and either Kodak Tri-X or Ilford HP-5 film.